Ingredients:
Where to buy For The Thrill in the USA?
If you can’t find where to buy For The Thrill near you, we can easily help you find a place where you can quickly and cheaply buy.
You can click on “check price” button and find out where to buy to buy For The Thrill.
How to find the best price on For The Thrill?
We are always ready to offer you recommendations on where to buy For The Thrill at one of the best price on Internet.
Please, feel free to follow the “check price” button to find price we chose for For The Thrill .


dopeyOwl5
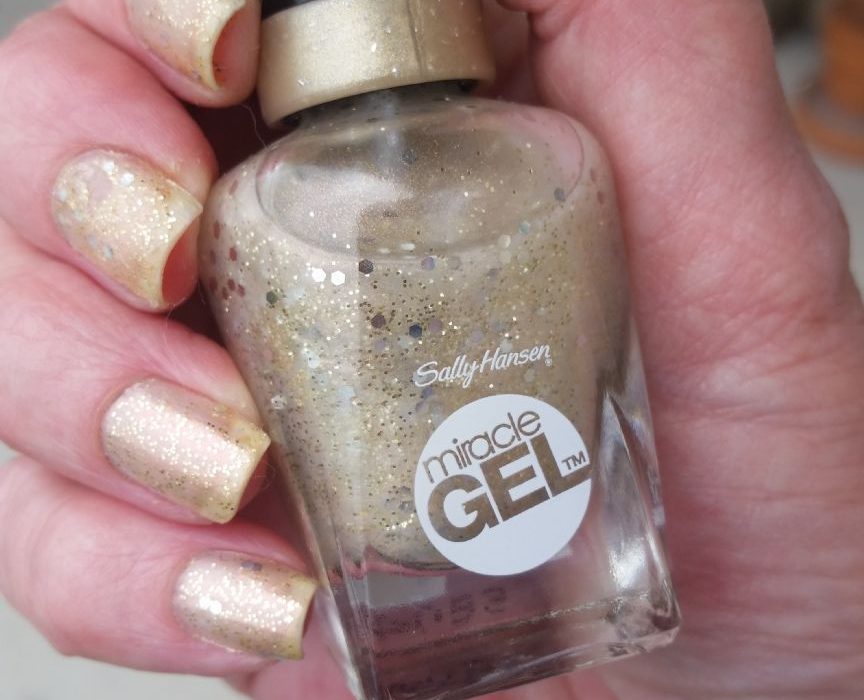
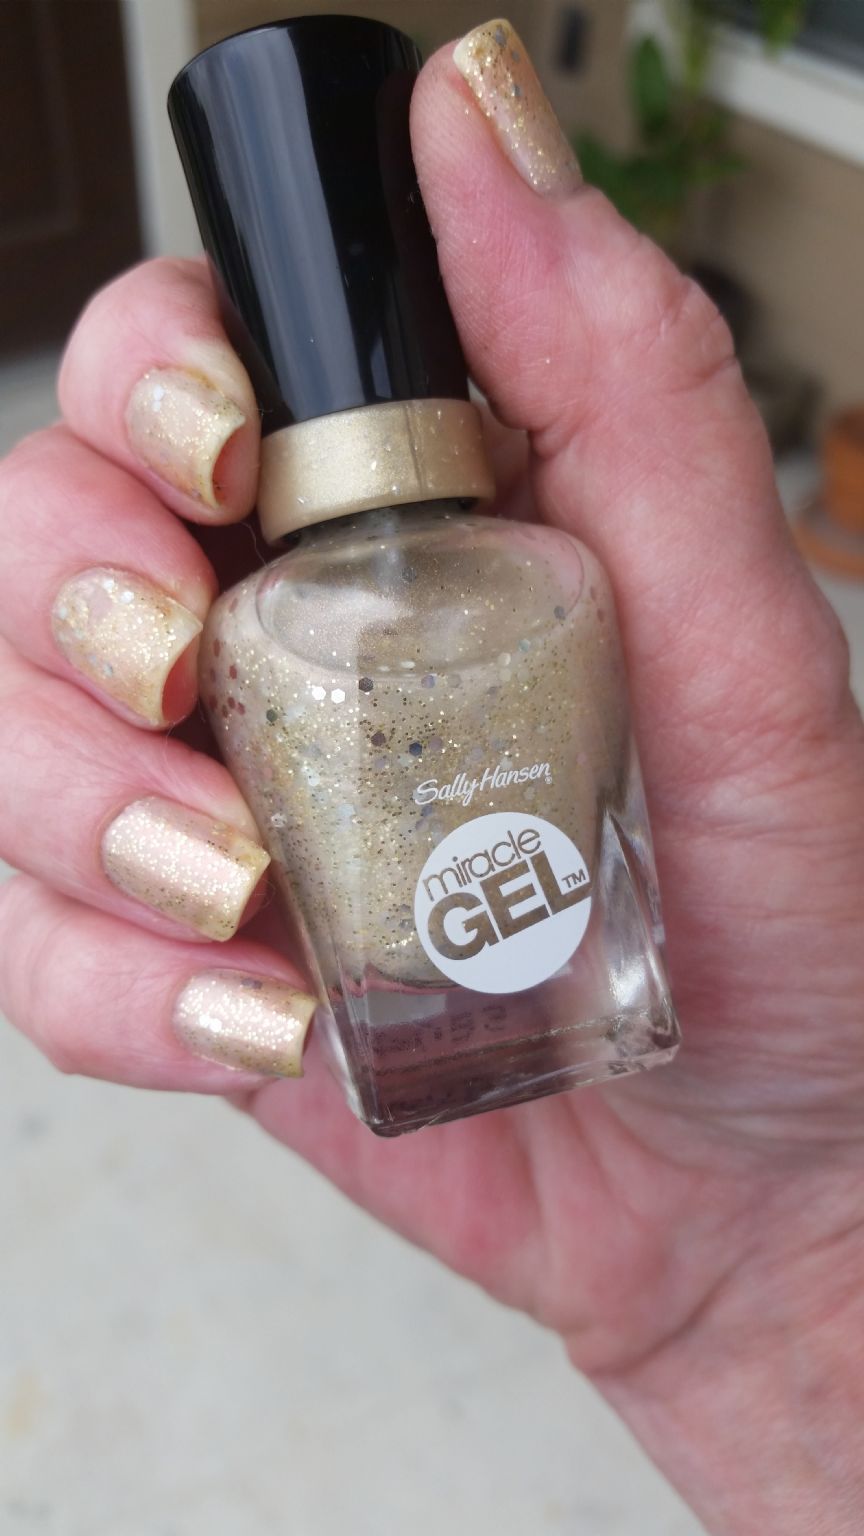
For The Thrill is a beautiful gold polish with mid sized silver hexagons and gold microglitters suspended in a gold polish base. This is Step 1 and a part of the Miracle Gel Line. I already had the top coat which is Step 2 at home from a previous purchase. I will say right now that this “Miracle Gel” polish is not any different from any other polish in the Sally Hansen line as far as application, performance, looks, or lasting power. It is not comparable to a professional gel manicure and does not last like the advertising claims. Of course notice in the advertising that they have an asterisk symbol to refer you to the fine print and that is where the disclaimer is letting you know it is not 100% guaranteed for everyone to last as long as the advertised claims. In any case, I still purchased this pretty color even though is it a bit more costly than the Complete Salon Manicure line. I did not expect this to last 10 days or 2 weeks. I ended up wearing this for 6 days. It did last that long. I ended up with good wear on this one and no chips. It was hard to tell if there was tip wear or not as this wasn’t completely opaque and the color was so close to tip color that I couldn’t really tell. The formula on this is decent and it was easy to apply and the glitters were plentiful and remained suspended in the polish so there is no need to tip the bottle upside down before use, no fishing for glitter, no dragging or balding. This has a nice flat brush and a wide tip so it is easy to apply the polish. However, my nail beds are small so I ended up using the side of the flat brush so it didn’t flood my nails with polish. You cannot get the bottle look though on the nail. I ended up with 4 coats and while this was opaque it certainly still had visible nail line and still didn’t look as opaque as the bottle. I think the next time I will use a base color of a solid gold polish and then this as a topper instead so I can get the beautiful look without all the layers. I really like the way this looks on me and it is a very elegant looking polish with the sparkles embedded. This is a subtle glitter and not in your face at all. It dried very quickly too and I didn’t use a fast drying top coat as usual. I only used the Miracle Gel top coat. Removal was pretty easy for a glitter too, but I did use a remover that contained 92% acetone. While I liked this quite a bit, it simply isn’t worth the higher cost of the Miracle Gel line. I think I can create the same effect using regular gold polish and glitters by doing the sandwich mani technique. For someone who already has a large collection of polish, this probably isn’t something you need, but it is pretty.
annoyedDove9
For The Thrill is a beautiful gold polish with mid sized silver hexagons and gold microglitters suspended in a gold polish base. This is Step 1 and a part of the Miracle Gel Line. I already had the top coat which is Step 2 at home from a previous purchase. I will say right now that this “Miracle Gel” polish is not any different from any other polish in the Sally Hansen line as far as application, performance, looks, or lasting power. It is not comparable to a professional gel manicure and does not last like the advertising claims. Of course notice in the advertising that they have an asterisk symbol to refer you to the fine print and that is where the disclaimer is letting you know it is not 100% guaranteed for everyone to last as long as the advertised claims. In any case, I still purchased this pretty color even though is it a bit more costly than the Complete Salon Manicure line. I did not expect this to last 10 days or 2 weeks. I ended up wearing this for 6 days. It did last that long. I ended up with good wear on this one and no chips. It was hard to tell if there was tip wear or not as this wasn’t completely opaque and the color was so close to tip color that I couldn’t really tell. The formula on this is decent and it was easy to apply and the glitters were plentiful and remained suspended in the polish so there is no need to tip the bottle upside down before use, no fishing for glitter, no dragging or balding. This has a nice flat brush and a wide tip so it is easy to apply the polish. However, my nail beds are small so I ended up using the side of the flat brush so it didn’t flood my nails with polish. You cannot get the bottle look though on the nail. I ended up with 4 coats and while this was opaque it certainly still had visible nail line and still didn’t look as opaque as the bottle. I think the next time I will use a base color of a solid gold polish and then this as a topper instead so I can get the beautiful look without all the layers. I really like the way this looks on me and it is a very elegant looking polish with the sparkles embedded. This is a subtle glitter and not in your face at all. It dried very quickly too and I didn’t use a fast drying top coat as usual. I only used the Miracle Gel top coat. Removal was pretty easy for a glitter too, but I did use a remover that contained 92% acetone. While I liked this quite a bit, it simply isn’t worth the higher cost of the Miracle Gel line. I think I can create the same effect using regular gold polish and glitters by doing the sandwich mani technique. For someone who already has a large collection of polish, this probably isn’t something you need, but it is pretty.